Tuesday, 7 May 2019

Major Project 21 - Title Design

I wanted the title to reflect the sci-fi and western themes of the film. My plan is to make the logo in 3D to give some cool animation and lighting. I have never been confident with typography, so I asked Andy to be my ideas man. I gave him a brief of keeping the text in a modern vain but with slight hints of western inspirations too. I didn't know how to go about this so I left him to play with it because I trusted his ability to make some cool ideas.


This sheet was really cool with many different takes on the ideas for the logo. The version I liked the most was the upper right title but in the long version rather than stacked. I really like the unique silhouette of this design. The notes I gave to Andy was just to develop that path further and bring some more western ideas into it. He came back with these ideas...


I really liked the way this develops, my favourite being the very bottom version. But I had concerns with the legibility of it. The 'i' and 't' look identical in the way they join together.

So when I came to make the title in Maya, I experimented with the position of these gaps in order to make the top line of the 'T' more identifiable as a 'T'. The modelling is going well, and faster than expected.


I feel this works very nicely. Once I have finished modelling the logo, I intend to animate the letters flying into place and play around with some cool looking lighting for a nice title screen at the end of the film and branding for the film. 

Monday, 6 May 2019

Major Project 20 - Laser Blasts

After the city was finished I quickly got to work on completing all of the laser shots. I had done one shot of the laser effect over a month ago, but I went back to that and refined it a bit more. I am using particle world to create the main stream, then distorting that with vector blur to create the strange fractal look. I have been adding lots of glow and flares to these blasts because I really want them to feel intense and powerful. 


This is a fairly easy process for all shots, the main variable is changing the delay of the trail behind the main laser bolt. I'm pretty happy with the laser blasts, I think the lens flares really add a lot to it. 


ROAM VFX 3 - Last Two Shots

The last two shots I had to complete for the ROAM film needed muzzle flashes from another artist first. So once they had arrived, I got to work on adding the blood. These two shots required some rotoscoping first since there were other characters going in front. This could be a pretty rough mask since the shots are so quick and the flashes distract. 


I used the same technique to create the blood as the other shots. Combining VFX assets and particle simulator. This create a realistic dynamic to the blood. The second shot got approved first time, but the second one has been asked to be made more gory, to make the blood spread much further.

I'll be doing this in the coming weeks along with other shots since I have been asked to take on more shots with blood effects because they like what I've done so far so that is nice to hear, and should be good experience. 


Wednesday, 1 May 2019

Major Project 19 - Getting Worried

With only a week until the deadline, I've accepted that I won't be able to finish my film for the deadline. This really upsets me, but I know that it's just not realistic anymore. I am still very confident to get it finished for the end of year show. 

I have been consistently a week behind schedule for nearly 2 months since waiting for the final drone and textures from Dan. While he was behind schedule too, I could definitely have been doing more in this time. I initially had 7 weeks of drone animation on my schedule, which was more time than I needed. When I did receive the final drones, I was 4 weeks behind, with only 3 weeks left dedicated to drone animation, which I then completed in 4 weeks.


But in the weeks waiting for the final drones, I could have been doing more to get ahead with other types of shots. My mentality at the time was that I didn't want to get caught up doing lots of other types of shots then having to go back to drone animation, I wanted to do every kind of effect in it's own chunk. This inability to be flexible has ultimately caused the main delay and resulted in the film being unfinished. 

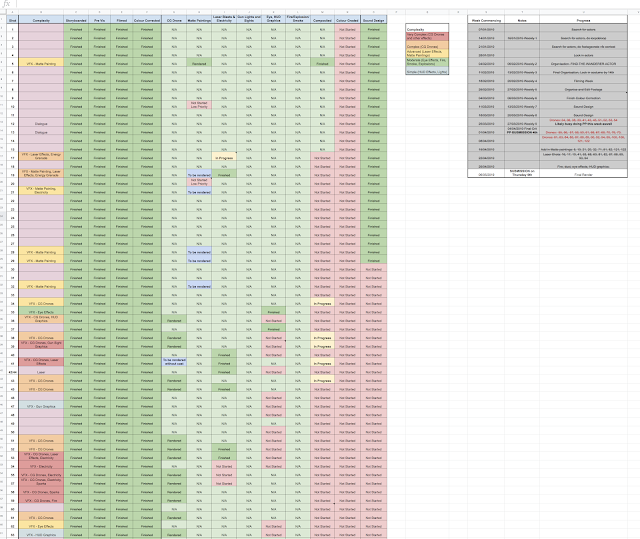
I have been very organised other than this main setback, prioritising shots in order of how important they are to telling the story. My priority between now and hand in is to make sure the film makes as much sense as it can, I hope I can still get a lot done, however I know that it will not be properly finished. 


Sunday, 28 April 2019

Major Project 18 - City Compositing Pt.2

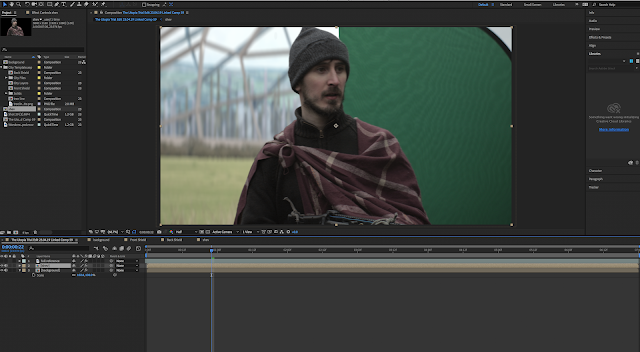
Any shot where either character is stood in front of the city was achieved either of 3 ways. There were about 3 or 4 shots in which the actor was filmed on a greenscreen to make background replacement very easy. However some shots didn't allow for this to be done, due to camera placement or movement, so then I would have had to manually rotoscope them out. Instead, I managed to use luma extraction to achieve these cutouts. This was an amazing time saver that worked way better than I expected it to since the valley was usually filled with foggy atmosphere, giving me enough contrast to be able to extract just Liam. If I couldn't do that, I had lots of rotoscoping to do.


82 (side on running shot) is the main rotoscoping shot. I have to fully roto his upper body for about 150 frames. This is proving a very long process... There are a few other shots where I've only needed to roto a small part of the body or not for the whole shot. I have managed to get through about half of the roto on the head for shot 82, but I'm leaving it for now to focus on bigger things, as it stands, it looks ridiculous, but you can at least understand what it is supposed to look like. 


Overall, I'm really happy with the way the city sits in the background of the shots in the film. Think I prefer the shots where it isn't the focus, and is just slightly visible, as it makes it feel more natural and it really is just sat in the valley. In hindsight, I could have maybe spent more time refining and optimising the city files to run smoother, which would have saved more time overall in test rendering just for previews. I also could have made more of an effort to use the greenscreen for some more shots rather than relying on rotoscoping as this has added much more work later down the line. 


Major Project 17 - City Compositing Pt.1

With the city rendered, I started work on compositing it. There aren't too many shots which contain the city but I started with the first shot we see it because it is the hero shot showing the whole thing, which lets me experiment and create the complete look that I want before doing the same on the other shots. 


One of the main issues with doing this effect was the computer power itself. The city consists of many layers with different blending modes and the shield has lots of effects to create the pulsating look to it. This really makes my computer struggle, which takes much longer for me to preview what I am doing. I'm not certain what is so badly optimised about this particular effect, but it's making it hard to work as fast as I otherwise could. 

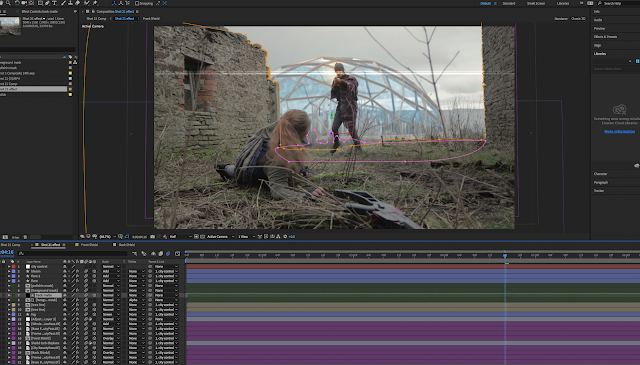
I am happy with the look that I've eventually come out with. I feel that this does look more realistic than the 2D matte painting and is much more flexible to light and composite. The big light on the top of the centre spire is the only thing different from Bach's design. I decided that the long lens flare added a nice bit more interest and some interaction with the foreground, since this can flare in front of and be obstructed by the building and characters. Otherwise, I kept as exact as I could to Bach's design. 

Saturday, 27 April 2019

ROAM VFX 2 - First Two Shots

After choosing my shots, I received the footage from the producer. 2 of the 4 shots that I was taking on, had to have muzzle flashes added first which were being done by someone else, so I did the other 2 first. 

These both involved a soldier in a headlock being shot at and I had to add bullet hits, blood and sparks. The predominant effect used was particle world to create dynamic blood effects. This let me move the emitter to cause the blood to react and move realistically with the momentum of the face wound. I then applied a vector distort blur to this to avoid it looking like particles and more like it's clumping together. 


I also used particle world for the sparks in the background along with flashes of glow. This came out pretty nicely I think. The part that I wasn't as proud of is the bullet wound on the face. I think this doesn't look realistic and could have been done with more texture and bloody wetness for the gore and realism. 

Overall though, I think these first two shots have come out nicely. I submitted these two shots for review on Frameio and they both were approved first time so that is really good, I'm happy with that. 

Tuesday, 23 April 2019

Major Project 16 - Drone Compositing

I am really pleased with all the finished animation of the drones. I believe they all came out really nicely. I managed to finish off rendering all shots over the easter break which worked really well as the space was empty. This let me render all day and night on many computers. 

The renders have mostly come out nicely, the textures really add a great amount of realism, roughness map especially. The main issue with these is that most shots are too shiny. Since I had rendered with AOV render passes, I thought this would be easily fixable. But when I started attempting to combine these renders passes, I found the results didn't come out as nice as the beauty pass. Dimming the amount of reflection also only changed how much reflectivity there was, not the diffusion. I experimented playing around with blurs and mattes to create the same effect, but it was quite a long winded way of making little difference. 

In the end, what I have done most of the time is just dim the whites in colour correction to at least make the specularity less noticeable. The only AOV pass that I really used was the emission pass for create glows and lens flares from the lights on the drone. This has gone well and also grounds the drones into the scene. 


I am happy with the composite of most shots, usually involving colour correction to bring down contrast and raise the blacks a bit. Then I slightly blur to match the footage, some shots have focus shifts where I have used camera lens blur to achieve this and match the anamorphic lens effect I achieved with the filter. 

If I have time, I plan to swap out these renders for slightly more diffused renders. This is something I can do pretty easily but it is a shame that I have to. 

Friday, 19 April 2019

Major Project 15 - Even More Drone Animation

I'm nearly finished on the drone animation now. It has been really fun animating all these shots, more-so than I expected. The shields have been one of the more satisfying parts in the way that I can make them react to each other and slam into each other (which the sound design should hopefully accentuate in a nice way). They can react to the many different needs and makes a good more visual interest to the drone, otherwise they would likely just look to static. 

I am currently working on the final explosion of the mrk 4 drone. I am doing this in the same way as the first drone destruction because a dynamic simulation was proving more trouble than it was worth. This was much more fun than the first time because it was a much bigger explosion and the pieces scattered much farther. I made sure to keep the trajectory of the laser blast and the drone itself. 

Since the pieces are falling from much higher, I thought it would be cool if some stuck into the ground instead of just landing and bouncing. I mainly kept this to anything that looked sharp or heavy. 


I can then use this document, combined with the first explosion to create the leftover rubble on the ground the ending sequence. This should be fairly easy once I have finished animating all the parts of the mrk4 drone. 

Also this week, I revisited the bricks from shot 53 when Liam shoots a hole in the wall. I had spent a lot of time trying to give these bricks dynamic physics which was just taking up too much of my time so I have again decided to manually animate these bricks. I am disappointed in myself that I haven't ended up using these kind of techniques, but they have just been causing me more trouble than they're worth. In most situations, I would keep persevering to figure it out, but as I am starting to get a bit more worried about the schedule, I feel that animating these elements manually was more time efficient for me at this time. 


Monday, 15 April 2019

Major Project 14 - City Model

So after I gave Bach the brief of what I wanted from the city, he got to work very quickly. Starting first with a board of a few options. I wanted the cage idea to be irregular just like the drone body is. However it was rather tricky to strike the balance between keeping it in the same world as the city while also not making the city too intimidating as it is supposed to be a place to aspire to.

We eventually came to a design that we both really liked and so he started a detailed version. I gave him the background plate that the city would be placed into so he could match the lighting.

I really love the design he came back with, however when I was compositing it, I found that something about it was just not sitting right with me. Either it felt too flat, or the lighting wasn't realistic enough. 


After some discussion with Bach, I decided that it would be best to create the city in maya as this would allow me much more freedom to manipulate the lighting and depth using lenses in maya. These kind of things would take considerably more work from Bach if he were to do it 2D still, so doing it 3D is definitely more efficient. 

The model came along rather slowly, however I am pretty pleased with how it is developing, the buildings are taking a longer time as I keep deciding they feel too big in relation to the city. I want the city to feel really big and dense, so I keep scaling all the buildings down to add many more. I modelled a few buildings and then copied them, giving them a selection of different shaders. 


Creating the shield effect in after effects should be a fun experience as it will be the main moving interest in the shot, but I am going to finish working on all drone shots before I work more on the city shots. 

Monday, 8 April 2019

Major Project 13 - More Drone Animation

Continued on with more drone animation. These are going along much quicker than expected. As the drones are robotic, I have found the keyframing to be rather simple, often being happy with the result after just a few keys. I've been trying to focus on realistic motion and weight. The drones always have a bit of bobbing up and down from their propulsion engine. They also sway and twist based on their position and direction, as there is a single engine on their underside, this would create a rocking kind of movement. 

The second drone destruction was much easier than the first but I found more satisfying. I didn't have everything fall apart since this was more of a glitch and shut down rather than full destruction. I really enjoy the way the ring and shields just fall as the idea is the electro magnets would turn off. I also keyframed the emission shader turning off as well which I am really happy with. 

The moment in which the wanderer punches inside the drone's jet engine was a slightly more tricky part. I first thought of tracking Liam's hand to attach the drone to, but since there was already the 3D camera's movement, I ended up doing it by eye. This seems to work in the viewport, however I will have to review this once rendered and composited. 

Speaking of rendering, I am starting to render the backlog of shots through the nights and during the easter holidays, I plan to render through day and night. This is the first time I have used AOV render passes for diffuse, emission, specular, and indirect. This should be very useful in compositing. I'm really happy with what Dan has done with the textures, I think they look incredible. I am again using HDRI images shot on location for the lighting to be as realistic as possible. 


At my current pace I hope to get all drone animation done in the next 2 weeks. This is slightly over schedule but the time waiting for finished drone has pushed me back a bit. However I'm still confident I can get the film finished in time. 

Saturday, 6 April 2019

ROAM VFX 1 - Introduction to opportunity

I recently received an email from a film producer based in LA. He is part of a team creating a low budget sci-fi action film called ROAM. He had seen my showreel on Vimeo and wanted to get me involved on the project. There are many VFX artists from the US and UK working on many shots. He sent me a sheets document for me to choose shots that I would take on. For now I am just taking on 4 shots containing bullet shots, muzzle flashes and blood hits and splatters. 

This is a quite exciting opportunity and while I may not end up getting paid for it (based on how the film lands) it is still a good thing to be involved in and is still a credit. I will start working on these shots in the next few weeks on weekends and evenings. The producer is very understanding about the fact that I am also working on my own film at the same time. 

Sunday, 31 March 2019

Major Project 12 - Drone Animation

Now that the textures are all completed, I can move on to finishing animation and rendering. The few shots that I had already animated before needed to have their animation copied onto the latest version of the model because the UV had changed. This was an extra hassle due to my haste to get onto animating while waiting for Dan to finish the drone. It wasted quite a bit of time, which was slightly irritating. There were only 5 shots where I had to do this so it wasn't too bad. The new animation on following shots is easy enough, as it is only the drones flying which involved just a handful of keyframes so it is going at a very quick pace at the moment.


The longest shot to complete so far has been 41 where the first drone explodes. I had experimented with some dynamic physics simulations but they weren't working well. The issue was that I wanted to be in control of where the pieces landed. Also, because all these piece on the body of the drone are so tightly packed, they weren't reacting naturally when becoming soft bodies, they just flew off in really unrealistic ways. In the end, while keyframing the pieces took a long time, I believe it gave me much more control and the fiddling I would have had to do to a simulation to get it how I wanted would have been just as much an effort. I am really happy with the result of this shot so I don't mind that it was a time consuming task.


Friday, 22 March 2019

LoopDeLoop Piggy 3 - Animating (Part 2)

Animating the pigs proved more complicated that I expected, not on a technical level, but for the creation of the loop. I had considered using a simulation technique to create a dynamic scene, however this would surrender the control of where the balloons landed and so I wouldn't be able to make everything loop as nicely, also it wouldn't really be animation.


So I worked one at a time, bouncing balloons of the walls and onto other walls. To start with I did a 2 balloon loop. This meant having balloon 1 end in the exact same place that balloon 2 started from, and balloon 2 would end where the 1st started. 

However as I went on, this became much more complex to comprehend. As I created looped involving many more balloons, which then bounced off of other in midair, I had to plan much more meticulously where the balloons were going. There is a loop of 4 balloons which go around in the middle in a very complex loop. If you follow 1 of these balloons around, it actually takes 4 loops of the whole clip for it to end in the place it started, however there is also always another balloon starting in that same place on the first frame of every loop. So there are kind of 4 versions of the life of one balloon loop happening at once. This was what was getting very confusing. I was taking many notes while going through this process, trying to keep it all straight in my head.

Eventually, when happy with the animation, I started on rendering. I started with a AIStandardSurface balloon preset, however it wasn't giving me the translucency and light glowing through that I wanted. After a lot of fiddling with more presets and tweaking the settings a lot, I came up with something I was really happy with. It is actually somewhere in between balloon and glass materials, but it gives me a light glow on the walls and floor that I am really happy with.


After 9 computers rendering simultaneously overnight... this was the final result. I am very happy with it, and excited to play with more lighting and materials in my final film project. 

https://vimeo.com/326158442

LoopDeLoop Piggy 2 - Animating (Part 1)

After finishing the pig head balloon model, I moved onto actually creating the animation. I recorded some footage of the hallway at university. Stepping side to side allowed the footage to be easily repeatable or reversed to create the perfect loop. However once I started tracking the footage and cutting takes into loops, I decided against this idea.

It was hard to make a version that was looping nicely as well as the HDRI hadn't come out successfully to create realistic lighting. I think this was due to it being a small space so the stitching process was struggling. This would have worked with a 360° camera and would have given me realistic lighting, however I didn't have access to this tool. 


I instead then decided to create a fully CG hallway within Maya. This made everything look cleaner and also felt more in line with the brief being an 'animation' challenge, it felt weird to have real life background plates. 

So then I finally got onto actually animating, and this was were the real challenge began.

Monday, 18 March 2019

Major Project 11 - Eye Effect Final

While I was waiting for the drone to be finished I moved onto a few other effects that I was going to leave until later. From the tests I did much earlier in the project, I had decided on the way I wanted the bionic eye to look. I created the graphic circles and animated them spinning around. I was mindful to make sure they looked like they were doing something rather than just aimlessly spinning. 

I did many colour tests and after getting some feedback, decided on somewhere between blue and teal. Now this effect is very easily copied to other shots where the bionic eye is visible. However unless it is a closer shot, I won't bother with all the detail, I'll just have the glow and lens flare as you wouldn't be able to see the spinning circles in wide shots anyway. This will be a low priority effect though, I am focusing on everything that tells the story first then coming back to these additional things for the non critical shots. 


Thursday, 14 March 2019

Major Project 10 - Lasers and Time Ramps

I have started working on effects that change the length of a shot. This is especially relevant to shots with time ramps or any slow motion. The shot where the Wanderer dodges the laser blast and throws the energy grenade is one where I have made it slow motion only for the middle section of the shot to show him spinning and to focus on the fact that he has pulled out a grenade. I have created the effect as a whole in a 60fps After Effects document. This then allows the effect itself to be at a correct speed throughout, but then I can apply the speed ramp afterwards in Premiere, giving me more flexibility about timings and amount of slow motion. 

The other main shots like this are later on in the big climax moment when he is running through the field. I want this to only go into slow motion when lasers are fired and explosions go off. This should create a very dynamic and exciting look. This example, I will do after I have the drone animation done because I don't know where or when the lasers would be happening. 

Friday, 8 March 2019

Major Project 9 - Starting Drone Animation

Dan sent me the finished drone model so that I could start animating. I got to work straight away, working on the first shots in the film. I am animating chronologically through all the drone shots in order to keep everything clear and simple for me. 

The shots that I've animated are very simple, just the drones flying towards the house. Using the rig and controls set up by Dan has made this very simple to work with. The most complex of the shots I've done so far was when the 2 drones turn to look at the house after the middle drone was destroyed. Their shields then smash together as they charge towards the house. I wanted to really feel the weight of these hitting against each other and slightly bouncing. This accentuates the speed at which they react and turn their shields to protect themselves. I have also made a slight difference in reaction time between the Mrk IV drone and the Mrk II so that the Mrk IV reacts much quicker to show how it is a newer improved model.


I am however going to be putting this drone animation on hold for now. I will wait until Dan has finished the textures just in case there are any tweaks that may cause issues with what I have already animated. Hopefully this shouldn't take long so that I can get back to animating and back on schedule. 

Wednesday, 6 March 2019

Major Project 8 - Refining the Edit

In an attempt to cut the film down to a more concise running time, I went on a trimming spree. I watched through the edit multiple times, taking frames away from the beginning and ends of shots. 

I remember hearing about this technique in an interview with the directors of Avengers: Infinity War. They learned when they worked in TV that once they were happy with the structure of the film, they would go through and literally just pull out frames to bring down the total run time.

https://www.youtube.com/watch?v=tFuM1j1t7k0 36 minutes in.

Doing this in my edit, was successful in trimming the film down by around 20 seconds, however I still wanted to trim it further. So I went back through again and was much more aggressive with what I was cutting out. I cut shots that lingered for a bit too long, or just could be shorter and still serve the same purpose. I then found myself cutting a couple of lines which I realised did nothing for the story. I could have not had them in the script in the first place because they weren't really necessary if I had have combed through the script more thoroughly. This helped save me a lot more time, and bring the film to just under 10 minutes.

I am now going to go through and rough out any shot which has effects which might dictate the length of a shot, for example when there are time ramps and laser blast where the speed would change how much the shot needs.

Saturday, 2 March 2019

Major Project 7 - Editing

The editing process was a fun challenge. This is the biggest project I have ever undertaken, with over 200gb of footage to sort through and pick out the best shots.

Dialogue was something that I was excited about trying out, part of the reason I added so much of it to the script. I think that this was definitely the greatest challenge about the edit. Choosing the best takes that fit with each other took a long time because there were so many takes. I knew when filming that I should take a lot of takes because the opening dialogue scene is very important for setting up the whole film. I could have probably worked a bit quicker on deciding takes as I spent so much time just watching over and over for the tiniest of differences that really didn't make much of a difference. 

There was an interview with the lead editor of Amazon Prime's Counterpart where he would just do his first edit using the last (or second to last) take, then if something isn't working, he runs back down the line of takes until something works. This lets him move a lot quicker and get a first edit quicker because the later takes are usually the best and most refined, it then becomes much easier to tweak from there once there is a rough version to watch. 


This would have been a good way for me to work quicker to get my first rough cut. Instead it took a bit longer than I expected however I am still on schedule. The first rough cut is longer than the animatic was, coming in at around 11 minutes verses the animatic's 7 minute run. This is due to more pauses and ebbs and flows that make everything feel more natural, I didn't account for this in the animatic. I will trim this a little more to make everything a little more concise. 

Monday, 25 February 2019

Major Project 6 - Filming Week

The week of filming was an incredibly fun and stressful week. Thankfully everything went smoother than I could have hoped, but I was still very nervous about it beforehand anyway. I am proud of all the planning work I had done in the weeks leading up to filming and I think this really helped the shoot run very well. 

It was a great experience having a bit of a crew for this production as it let me delegate tasks to others allowing the whole process to move faster. Directing actors was a very fun experience, making sure they were all comfortable with everything they were doing and understood everything about the characters at that time. 

I think sometimes I struggled to put what I was thinking into words to give them the prompts they needed to give me the performance I wanted. I feel happy with all the footage I got, though I'll have to look through it all next week as I'm editing it together to see for sure.

After each day of filming, I reviewed everything from that day to see if there was anything needing reshooting on the next day. This was only necessary a couple of times, mainly due to the sunlight being too strong when all the rest of the shots were overcast.

Using the gimbal was a new and fun experience. I was really satisfied with the results I got using it for the action shots. The rest of the time I filmed with the camera on my tripod just to add a little bit of stability. 

Overall I'm really happy with the shoot. It went much smoother than I could have hoped. I did a lot of planning and organisation which I think really paid off and let us move really quickly. As well as having the people around me helping me out with other things so I could focus on filming and working with the actors. 


Sunday, 24 February 2019

Major Project 5 - Matte Painting Moodboard

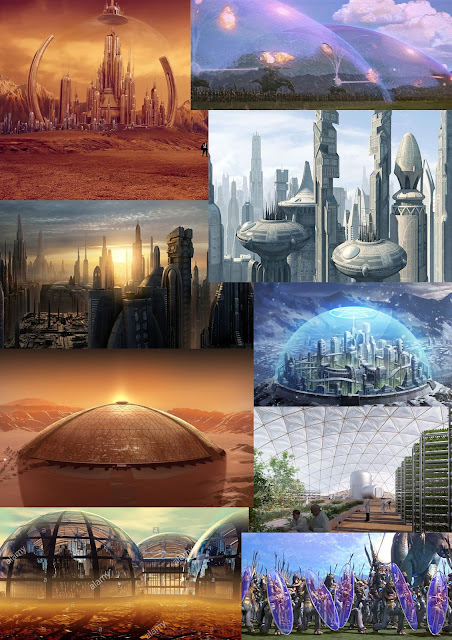
Here is a moodboard I have made for Bach for him to start coming up with ideas for the city of Utopia in my film. The idea I have is for the same low poly and angular feel of the drones to be translated into the city. The frame will be in that design of shapes around a city. In between that frame will be energy shields to complete the dome. 


Thursday, 14 February 2019

Major Project 4- Finding Actors

To find actors for my film, I put up a listing on Mandy.com. I am paying for their travel and food but I did state people should be Yorkshire based. 

I found an actress for the Stranger quite quickly. I liked her showreel and felt that she had the right demeanour for the character. So I emailed asking her for an audition clip and she sent it back. She was then confirmed quite quickly, and costume details were given to start work on that.

The Wanderer was much harder to find. Most people who applied were from London which is just unrealistic for what I can afford. I emailed a few people who I thought looked the part however they either didn't respond, weren't willing to take time off work for a student project or were just slow to respond. 

In the end, I asked Liam Shevill if he would be willing to be my actor again. He played the character in my COP film and did a very good job and he does look the part for the role. This was a massive relief and weight off my mind. Though I originally wanted a more professional actor in the role since it would be their specialty, I am confident Liam will do a great job. 

Wednesday, 6 February 2019

LoopDeLoop Piggy 1 - Ideas and Starting Model

I decided to do the 'pig' prompt for this months LoopDeLoop. I am going to make a balloon style pig head in Maya and composite it into real life footage. I haven't decided what exactly this scene will be yet but some ideas I have so far are;


  • someone bouncing the balloon, keeping it off the floor
  • balloons bouncing/circling around a room.
  • a bouquet of balloons bouncing around each other.

I will decide on this by the time I have finished the maya model. For the model itself, I am not worrying about it looking like a realistic balloon shape, I more want it to be cartoony and exaggerated. Here is what I have so far.

Tuesday, 29 January 2019

VR Dreamscape - Finishing up

I've nearly finished all three scenes now. I managed to fix the star seams issue rather easily. It turns out there was just a simple checkbox when converting the 3D scene to a 2D output in which you can state if you are using any 3D assets or elements so that the output can account for them.

https://www.youtube.com/watch?v=Ob9lgyeMjas


Making the scenes transition into each other has been interesting. I have tried to make this very gradual and slow as to keep with the mood of dreams and calming visuals. I rendered a low res version to show Grace and she really likes it. I was concerned about the simplicity of the visuals but when I asked her she said it worked better simple. 

https://www.youtube.com/watch?v=SsC0yYUgRgI


Rendering has been a long process with many errors. The composition is nearly a 6k file with many 3D layers, which has been causing many crashes and slow performance.


Now I'm just doing final checks and fixes, and maybe some changes when I send a final render to Grace. The installation itself will be on the 16th of February in Hartlepool. I will be looking over the VR part, making sure it keeps working as well as taking photo and video of the event for Grace and myself to evidence.

Wednesday, 23 January 2019

VR Dreamscape - Technical Problem Solving

As I've been continuing to work on the VR project, I have kept running into more and more issues. I tried one more test using a flat composition which made me realise that it was not going to be possible to achieve what I was thinking of doing using that method.

https://www.youtube.com/watch?v=dEQG2N_Swz8


After some further research, I discovered the VR environment features within After Effects. This consists of a three dimensional composition which is then rendered from 6 angles and merged into a map that can be read and wrapped by YouTube for seamless 360 video.

While this makes better results, it is still very fiddly to work with. I have been struggling to make the scene work as some effects aren't compatible with the VR systems in After Effects. This has caused many stitching issues like you can see below. I used particle world to create the shooting stars, however my first test didn't work well. The 6 sections of the world are visible as the 3D space of the particle generator doesn't seem compatible with VR. This will take further experimentation and problem solving in order to figure out.

https://www.youtube.com/watch?v=KCMqNppQlYU


Tuesday, 22 January 2019

Production Crate VFX Contest - Card Throw Effect

The website ProductionCrate.com run a monthly visual effects competition, with this month's theme being time ramp effects. I've had an idea to do a card throwing bullet time effect for a while now so this is a good opportunity to do that.

I started by filming footage of Alex pretending to throw a card into an apple. The card already had an apple placed into it. I filmed in 60 fps so that I could slow down the footage a good amount. I moved the camera in a whip pan to the apple so it wouldn't be obvious that the card was already there.

I then worked with the time remapping to accentuate both of these, speeding up the throw and impact, and slowing down the middle section. Doing this adds a greater contrast between the movements.

I ran the 3D camera tracker on the footage to create a 3D scene. This proved a bit tricky as there wasn't enough to track throughout the second half of the shot. I had to manually move the 3D camera for some frames as the tracker couldn't work it out. 

The card was made using a pre-composed solid, this allowed me to go inside the pre-comp to edit the face of the card at will. 

I realised after filming that the card in the apple was the wrong way round. To fix this I had to use MochaAE to track the plane and corner pin the image of the CG card to that tracking data. I wouldn't have had to do this if I had thought about the card more when filming the footage.

The conditions for the competition wanted at least one effect asset from their website to be used in the shot. I attempted to add small puffs of smoke and other semi realistic elements, however they had to be so subtle that they were more or less useless. I instead then made the piece more supernatural, theming the effect of the powers of the superhero Gambit. This let me use many effects from production crate. 

I personally still prefer the more 'realistic' version without any effects, however I am still pretty happy with the Gambit effects. The most satisfying thing for me is the switch when the card slows down. I am really proud of how simple the effect is but also think it looks convincing enough. 

https://www.youtube.com/watch?v=4wearbkSXmk


Saturday, 12 January 2019

Major Project 3- Eye Effect Test

The character in my film has an eye implant giving him a heads up display. Here I've done some tests to experiment with what this element could look like. 


I tried a few different approaches with the design. The first starting from the centre of the eye, the second being a screen coming down over the eyeball and the third loading from the side. 


Of the actual graphics themselves, I prefer the third version as it is similar to where I started going with the HUD graphics themselves. I do really like the idea of the screen coming down over the eyeball, though this is the harder of the three effects because I have to create a very fine mask around the eyeball itself. 

I also want to make sure I have the effect emit a light of sorts, as I like the image of the character having one eye glowing in wide shots.

I will finish developing the aesthetic of this element once I am in production of the actual shots.


Wednesday, 9 January 2019

Major Project 2 - Starting the HUD graphics

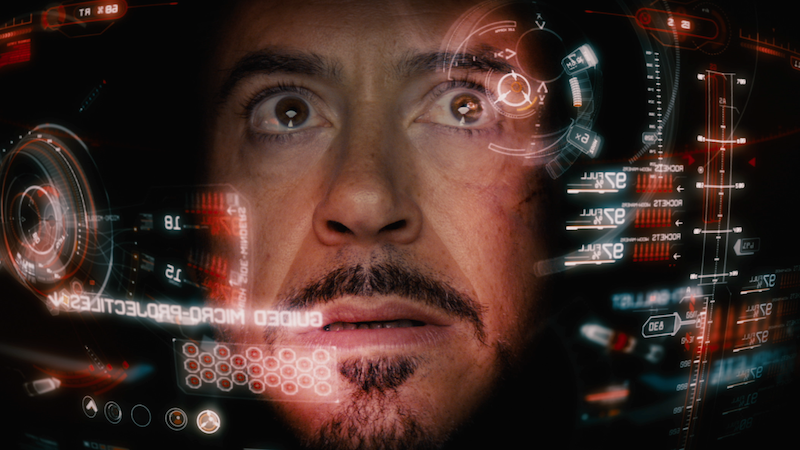
My film requires a heads up display (HUD) effect for multiple shots. This is used to convey information to the audience about the workings of the credit system within the world.


I have worked from many references of heads up displays from games and film 


Image result for game hud displayImage result for halo HUD

Image result for iron man hud


In 'The Visual Effects of Iron Man' there is a section where they talk about how they created the HUD for the first iron man film. This was very interesting and useful as to how I could create a HUD that felt useful and real. (HUD section starts at 7:30)

https://youtu.be/WUBXmEWudnA?t=450 


I have made an easily editable Photoshop file which will automatically update into AfterEffects. This file can be used as a template for any shot where the HUD is needed. This is just a start on this process, I will be finalising the design when I create it for the actual shots. When doing so, I can also experiment with more animation in the HUD.

Tuesday, 8 January 2019

VR Dreamscape - 360 Video Project

From the social meetup with students from Leeds College of Music, I have taken on a task for one of my live briefs. The student, Grace is working on an art installation about dreams. She is wanting a VR section to the event.

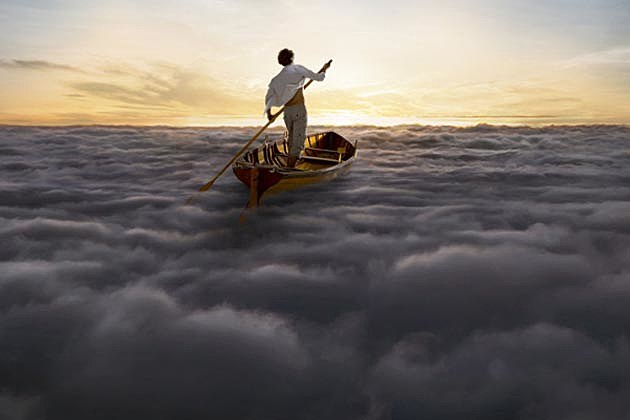
VR is something that I've not tried before but am excited to have a go at and learn how to do it. It will not be an interactive VR experience, but rather a 360 video to create atmospheric and dreamy imagery. Here are some inspirations I suggested to Grace, which I will be going forward with.

Image result for stars time lapse

Image result for shooting stars

Image result for the endless river

Experimenting with the technicalities of making a 360 video, I did this test. This was done as one flat 16:9 composition with basic solids and imagery from google images, just to play with how to do the effect. 


https://youtu.be/fAld1rKAbT0


Since this is just a flat video, I have had to try to manually make the edges of the screen match up with the other edge. YouTube's 360 video stretches the top and bottom of the image to a point. The main issues with this method is how I can create a seamless transition off one side over onto the other. I will continue to experiment with methods of creating this type of video to see what works best.