I wanted the title to reflect the sci-fi and western themes of the film. My plan is to make the logo in 3D to give some cool animation and lighting. I have never been confident with typography, so I asked Andy to be my ideas man. I gave him a brief of keeping the text in a modern vain but with slight hints of western inspirations too. I didn't know how to go about this so I left him to play with it because I trusted his ability to make some cool ideas.
This sheet was really cool with many different takes on the ideas for the logo. The version I liked the most was the upper right title but in the long version rather than stacked. I really like the unique silhouette of this design. The notes I gave to Andy was just to develop that path further and bring some more western ideas into it. He came back with these ideas...
I really liked the way this develops, my favourite being the very bottom version. But I had concerns with the legibility of it. The 'i' and 't' look identical in the way they join together.
So when I came to make the title in Maya, I experimented with the position of these gaps in order to make the top line of the 'T' more identifiable as a 'T'. The modelling is going well, and faster than expected.
 I feel this works very nicely. Once I have finished modelling the logo, I intend to animate the letters flying into place and play around with some cool looking lighting for a nice title screen at the end of the film and branding for the film.
After the city was finished I quickly got to work on completing all of the laser shots. I had done one shot of the laser effect over a month ago, but I went back to that and refined it a bit more. I am using particle world to create the main stream, then distorting that with vector blur to create the strange fractal look. I have been adding lots of glow and flares to these blasts because I really want them to feel intense and powerful.
This is a fairly easy process for all shots, the main variable is changing the delay of the trail behind the main laser bolt. I'm pretty happy with the laser blasts, I think the lens flares really add a lot to it.
The last two shots I had to complete for the ROAM film needed muzzle flashes from another artist first. So once they had arrived, I got to work on adding the blood. These two shots required some rotoscoping first since there were other characters going in front. This could be a pretty rough mask since the shots are so quick and the flashes distract.
I used the same technique to create the blood as the other shots. Combining VFX assets and particle simulator. This create a realistic dynamic to the blood. The second shot got approved first time, but the second one has been asked to be made more gory, to make the blood spread much further.
I'll be doing this in the coming weeks along with other shots since I have been asked to take on more shots with blood effects because they like what I've done so far so that is nice to hear, and should be good experience.
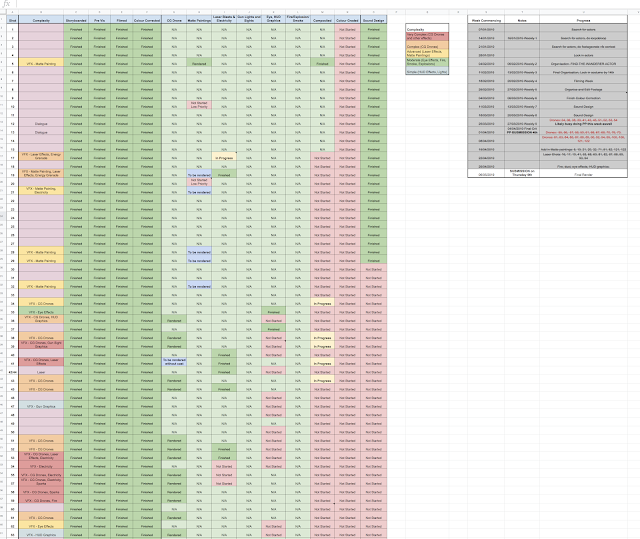
With only a week until the deadline, I've accepted that I won't be able to finish my film for the deadline. This really upsets me, but I know that it's just not realistic anymore. I am still very confident to get it finished for the end of year show.
I have been consistently a week behind schedule for nearly 2 months since waiting for the final drone and textures from Dan. While he was behind schedule too, I could definitely have been doing more in this time. I initially had 7 weeks of drone animation on my schedule, which was more time than I needed. When I did receive the final drones, I was 4 weeks behind, with only 3 weeks left dedicated to drone animation, which I then completed in 4 weeks.

But in the weeks waiting for the final drones, I could have been doing more to get ahead with other types of shots. My mentality at the time was that I didn't want to get caught up doing lots of other types of shots then having to go back to drone animation, I wanted to do every kind of effect in it's own chunk. This inability to be flexible has ultimately caused the main delay and resulted in the film being unfinished.
I have been very organised other than this main setback, prioritising shots in order of how important they are to telling the story. My priority between now and hand in is to make sure the film makes as much sense as it can, I hope I can still get a lot done, however I know that it will not be properly finished.
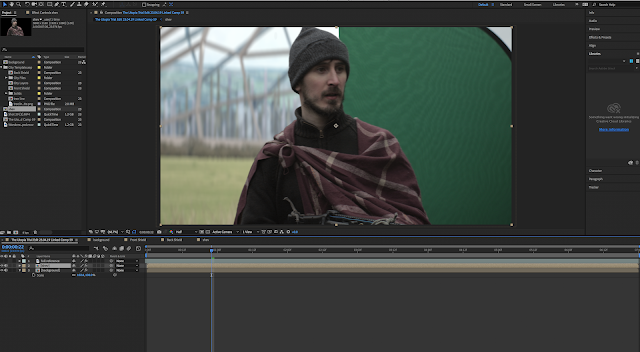
Any shot where either character is stood in front of the city was achieved either of 3 ways. There were about 3 or 4 shots in which the actor was filmed on a greenscreen to make background replacement very easy. However some shots didn't allow for this to be done, due to camera placement or movement, so then I would have had to manually rotoscope them out. Instead, I managed to use luma extraction to achieve these cutouts. This was an amazing time saver that worked way better than I expected it to since the valley was usually filled with foggy atmosphere, giving me enough contrast to be able to extract just Liam. If I couldn't do that, I had lots of rotoscoping to do.

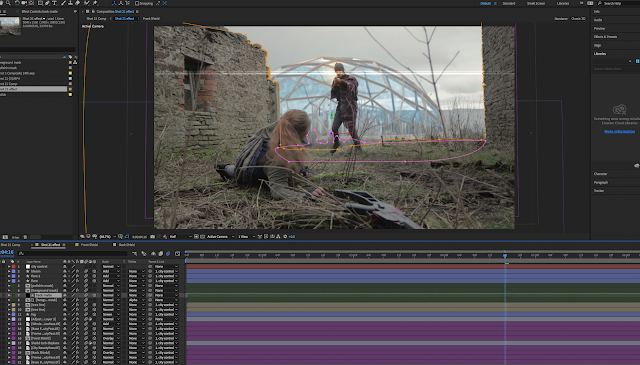
82 (side on running shot) is the main rotoscoping shot. I have to fully roto his upper body for about 150 frames. This is proving a very long process... There are a few other shots where I've only needed to roto a small part of the body or not for the whole shot. I have managed to get through about half of the roto on the head for shot 82, but I'm leaving it for now to focus on bigger things, as it stands, it looks ridiculous, but you can at least understand what it is supposed to look like.

Overall, I'm really happy with the way the city sits in the background of the shots in the film. Think I prefer the shots where it isn't the focus, and is just slightly visible, as it makes it feel more natural and it really is just sat in the valley. In hindsight, I could have maybe spent more time refining and optimising the city files to run smoother, which would have saved more time overall in test rendering just for previews. I also could have made more of an effort to use the greenscreen for some more shots rather than relying on rotoscoping as this has added much more work later down the line.
With the city rendered, I started work on compositing it. There aren't too many shots which contain the city but I started with the first shot we see it because it is the hero shot showing the whole thing, which lets me experiment and create the complete look that I want before doing the same on the other shots.

One of the main issues with doing this effect was the computer power itself. The city consists of many layers with different blending modes and the shield has lots of effects to create the pulsating look to it. This really makes my computer struggle, which takes much longer for me to preview what I am doing. I'm not certain what is so badly optimised about this particular effect, but it's making it hard to work as fast as I otherwise could.
I am happy with the look that I've eventually come out with. I feel that this does look more realistic than the 2D matte painting and is much more flexible to light and composite. The big light on the top of the centre spire is the only thing different from Bach's design. I decided that the long lens flare added a nice bit more interest and some interaction with the foreground, since this can flare in front of and be obstructed by the building and characters. Otherwise, I kept as exact as I could to Bach's design.
After choosing my shots, I received the footage from the producer. 2 of the 4 shots that I was taking on, had to have muzzle flashes added first which were being done by someone else, so I did the other 2 first.
These both involved a soldier in a headlock being shot at and I had to add bullet hits, blood and sparks. The predominant effect used was particle world to create dynamic blood effects. This let me move the emitter to cause the blood to react and move realistically with the momentum of the face wound. I then applied a vector distort blur to this to avoid it looking like particles and more like it's clumping together.
I also used particle world for the sparks in the background along with flashes of glow. This came out pretty nicely I think. The part that I wasn't as proud of is the bullet wound on the face. I think this doesn't look realistic and could have been done with more texture and bloody wetness for the gore and realism.
Overall though, I think these first two shots have come out nicely. I submitted these two shots for review on Frameio and they both were approved first time so that is really good, I'm happy with that.


