Wednesday, 17 May 2017

Applied Animation: 15th - 18th May 2017

This week was an intense one to finish everything off. The main thing I started with was finishing off the monkey's second swing. This didn't take too long since I was keeping it simple as to move on and get everything to an even level of completion. I kept the swing itself as just one drawing with the monkey reaching out toward the tree. There were then some little finishing touches like adding the vine and making sure the vine the monkey was swinging on was more visible.

The spaceman was the next big thing. I looked at many different types of spacesuits, but gathered references for the type I wanted to go with since it is the most iconic style. I created the keyframes first but in order to get the really smooth, weightless motion I was looking for, I actually opted for tweening him in the end. When he is floating through space towards camera, I had each limb as a different symbol layer so that I could tween it. I am very happy with the result and think that it achieves the weightless look I wanted because I made sure to offset the motions to make it feel more natural. Easing curves also helped to make it feel natural.


I then had the frame by frame movement of him grabbing onto the square. I did as many keyframes as I had time for but in the end I think it could have looked better. The motion goes too quick and breaks the slow and weightless feel of the rest of the movement, which could have been solved with more inbetweens.

I then got onto adding sounds for all the idents. I downloaded all the other idents in whatever stage of completion they were in and put it all together in Premiere. I searched online for many different sounds that I needed. I really tried to think of any sound possible to really make the ambient sounds feel alive. I really enjoy playing around with sound effects, changing the way they pan from different sides on headphones and changing pitches to fit the scene. I find this sort of thing really satisfying which is why I volunteered to do all the sounds.

After finishing up with adding sounds, all that was left to do was to replace the unfinished ident footage with the final finished ones and then render the big compilation.

Sunday, 14 May 2017

Applied Animation: 8th - 14th May 2017

This week was continued work on backgrounds and animating. I was upset to find that the document I'd started for the jungle background had corrupted and wouldn't open, so I had to start this background again. 

We then had the critique on tuesday. It was unfortunate that any feedback we received was either about it simply being unfinished or things that we already planned on adding. So this crit wasn't as useful to our group as expected.

The most time this week was actually taken up with creating the jungle background. It took a long time to make all the many different layers of trees, though a few nearer the beginning were duplicated and flipped or otherwise distorted, as I got closer to the camera I didn't think I'd be able to get away with doing this. 
Once I had finally finished this background, I imported it into After Effects and displaced all these layers in 3D space. I separated them all by quite large distances to ensure that I got a great feel of depth in the jungle. 

I then finally got into actually animating, I only have 2 characters to animate, the monkey and the spaceman. I thought I should start with the monkey since this is what I'll struggle most with. I'm not confident with drawing animals at all so I knew this would be a challenge. I gathered reference pictures of monkeys swinging but started to narrow down to a chimpanzee. I found a few videos of chimps swinging through trees too. This proved very helpful.

I struggled to draw the chimp consistently. I think I found it hard to draw because it is so close to being a human figure that it makes everything feel wrong and out of proportion. Though I'm not happy with the monkey itself, I am very happy with how it moves and pulls its weight throughout the swings.

The second swing was more difficult because I wanted to have him swinging in a different way but this was hard to work out the physics of how it would actually work.

Going into the final week, I have quite a lot to still do. I need to finish the monkey and composite him into the scene, then do the spaceman floating in space and finish compositing all of that. I then also have to do sound. It's going to be a push but I think I will be able to manage it.

Tuesday, 9 May 2017

Applied Animation: Maya Modelling

This is something I have been really excited for because it's something quite new to me. I have played with 3D before but never in Maya and never with such complexity.

Despite the tutorial, I actually didn't start with making the truck, I just went straight onto the 'Do it yourself' task. This wasn't really done intentionally, I just found myself making the TARDIS after loading up the program and playing around with some of the tools. I really loved playing with a new program like this and feel I picked it up pretty quickly and am excited to explore it further and learn more.

The colouring was a part that I found a bit challenging. I couldn't get the colours to apply properly. I think I made it more complex for myself than it needed to be since I was also trying to add a wood texture along with the blue. I eventually worked it out by just continuing to try many methods and options and just experimenting with it. I didn't manage to get the texture working but this is something I will try to do in future.

If I were doing this again, I would be able to make it much neater. I experienced some issues with the edge loop tool not detecting the mesh all the way around. I had made a lot of the initial indents using new cubes, whereas if I were doing this again I'd just make extrusions to keep the mesh tidier and easier to manage.

Although the brief didn't ask for it, I really felt like I had to animate this. I had made a 3D model of the TARDIS... it just needed animating. I played around with trying to group all the different polygon elements I'd made and animating them all together. This however still made everything rotate around their own anchor points so I instead combined the mesh into one object and animated that. I used the graph editor to get a natural feel to the TARDIS landing and give it some weight to which I'm really happy with the result. This animation can be found in the 'Animation Skills' folder.

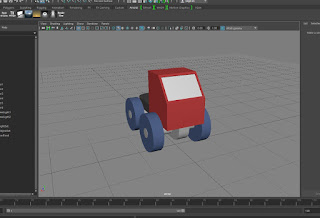
I then came to making the truck, this didn't take very long since I had already made the TARDIS and the spacestation models and was really starting to get the hang of it. The only issue I encountered was when the program just crashed when I tried to bevel an edge, so I had to start again, but it still didn't take very long.

I was having trouble lighting and rendering in both of these tasks, but for different reasons. The TARDIS rendered properly once I was shown what to do with lights and render settings and I could do it myself again and again on many different angles. Doing this also worked first time when making my spacestation. The truck however simply wasn't working with lights. I went about it in exactly the same way as my other 2 models but everytime I created a light, it was just a blank object with no lighting attributes. I tried copying the truck into a new document and the same issue occurred. I tried copying lights from the TARDIS file as I knew that they had worked fine, but when moved to this document they stopped working and wouldn't actually light anything. This was incredibly frustrating. 

The issue turned out to be something to do with my computer at home as it worked first time when adding lights in uni. I will have to look into this in future to try correct this issue so that I can add lights on my own computer.

I have really enjoyed getting started in Maya. I feel that I've learnt quite quickly. I'm happy with what I've created and am excited to see where I can continue to take it in future. I feel like the way I am most likely to use it is to create backgrounds as reference for 2D animation so I want to get some practice in over summer. 

Sunday, 7 May 2017

Applied Animation: 1st - 7th May 2017

We started work on creating assets and backgrounds for all our idents. I started work firstly on the jungle one since I knew this would be the most work. I knew I had to make many layers of trees to make the jungle feel much deeper and full. I want the monkey to really feel like it is swinging forward toward the camera so therefore I need more depth. 

I also started on the backgrounds for the space ident. While thinking about this one, I decided that there wasn't much visual interest with things happening on screen. To make something of interest in the background, I started to make a 3D model of the international spacestation to draw over afterwards. This is a very efficient way of drawing such a complex shape moving. This lets me not worry about having to keep proportions on different angles. I really enjoyed creating this 3D model too. When I added the many different lights it really made the whole thing pop and I am so happy with the result. The orange lights I added behind the spacestation, to act as the sun, reflect very well on the panels. I also added a blue/white light over the top to add some ambient light in the way of light bloom from the earth. This adds contrast to the shapes metallic structures and makes them stand out. My original intention was to use this as a reference to draw over but after adding all these lights, we agreed that this model itself could work in the final thing. It will require maybe adding a filter or something but I think it does fit very well. 


The earth was quite fun to make, I used google earth as a reference for the part of the world I wanted in frame. I am really happy with the result of these elements, I think I've struck the balance between realistic and stylised. 

The background for the city ident is one that I am really proud of. I went into more detail than I was expecting. It also took me way longer than I intended because of the amount of buildings I added. I also am very happy with the buildings further in the foreground since I made them more 3D. I added all these layers together in Animate and displaced them in 3D space. This allowed me to move the camera to create the parallax in layers. I only had to copy the animation from my animatic over onto the new elements since I was really happy with that movement. 

Wednesday, 3 May 2017

Applied Animation: Maya Animating

I very much enjoyed doing the Maya animation tasks, it's a very easy thing to get used to with the interface being incredibly intuitive.

I found the graph editor so useful and also very easy to pick up because it uses the exact same principle as graph easing in Animate, Premiere, After Effects and many others.
I really like how each polygon object has it's own path. Especially when doing the segmented pendulum, it was so useful to break up with movements and even edit them from the graph editor. I can see so many great uses for this and I can see it making refining movements so simple and effective.

Obviously, I also animated the TARDIS and spacestation, the TARDIS was a bit more complex because I was trying to get weight in it's landing but I found this exciting to try.

I did have some trouble when I came to exporting these final playblast videos. Whenever I did it, it would just export as a blank green screen. I was really confused by this but it turned out that this was something to do with the default player it was opening in as when I opened the video file from its saved location, it was working just fine.

I think that I actually enjoyed modelling in Maya a bit more than animating. Maybe because it was more of a new feeling that the animating as that feels very familiar and comfortable. I did really enjoy animating though as it was great to see these elements come to life and it's so easy to do not having to redraw anything if you want a different angle or movement. I am very excited to further explore 3D modelling and animation in Maya.